CRUD operation using Scaffold Template with Entity Framework 5
Posted By: Ajay Saptaputre, 09 Aug,2015 | Total View : 6323
In this article I am going to discuss how to create basic ASP.NET MVC Scaffolding application using Entity Framework 5. Why Entity Framework 5? Good question, I will discuss more about this but let's first start creating application.
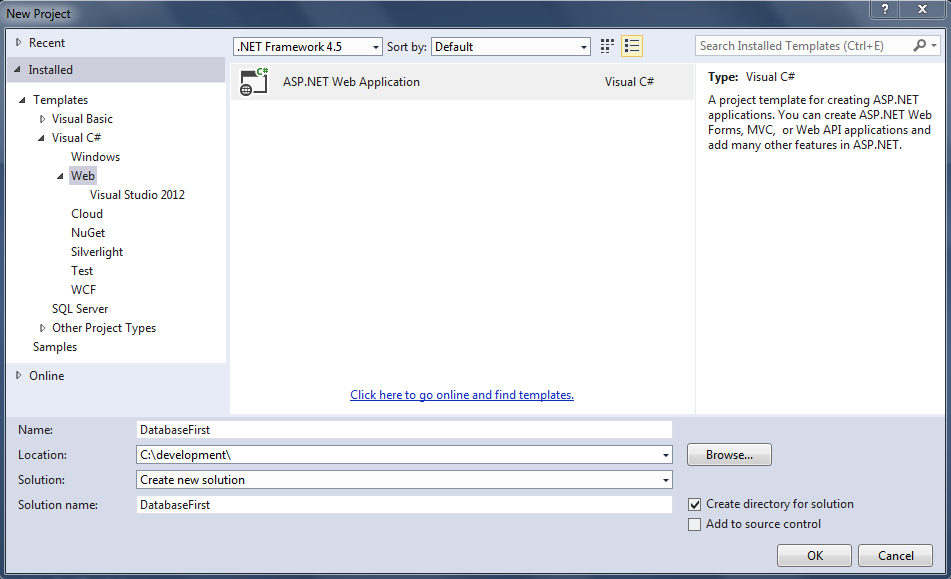
Step 1: Start Visual studio 2013, click on "New" Project from "File" menu and select "Web" and then "ASP.NET Web application" from "New Project". I am selecting .Net framework 4.5 to build this sample application. All right, now give proper name to your application and click "Ok" button as below screen shot illustrate:
Step 2: Once done, you will see another window which asked to select "Template". Select "Empty" and click on "Ok" button as bellow screen shot illustrate:
Step 3: All right, till now everything looks good. Now come to our earlier point: Why Entity Framework 5 because, ASP.NET MVC scaffold does not support Entity Framework 6 or later version.
But if you are already added Entity Framework 6 in your application and experiencing "MVC scaffolding does not support Entity Framework 6 or later" error, this menace that an older Entity Framework version need to be install which is compatible with ASP.NET MVC 5 in order to build Scaffolding application in ASP.NET MVC 5.
But, again question might come in your mind how? It's quite simple you need to follow bellow simple steps to begin with ASP.NET MVC 5 Scaffolding. If you have already added Entity Framework 6 in your application, just uninstall from application. To do this:
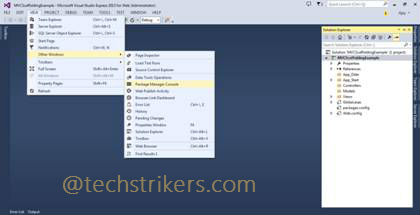
Open the Package Manager Console:
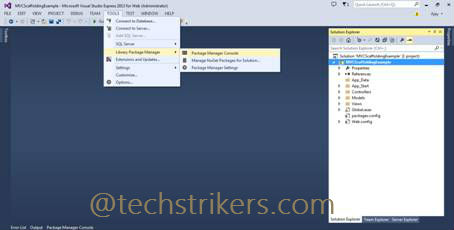
OR
Select View -> Other Windows -> Package Manager Console
How to find out what EF version is installed, run the following command in the Package Manager Console:
Get-Package EntityFramework
Now, in the Package Manager Console, uninstall the current EF package by executing the following command:
UnInstall-Package EntityFramework -Version <version number>
Remove the entry from web.config file if you had installed EF 6 earlier. To do this:
- Open the Web.config file in the project directory.
- Delete the following lines.
<providers>
<provider invariantName=System.Data.SqlClient
type=System.Data.Entity.SqlServer.SqlProviderServices,
EntityFramework.SqlServer />
</providers>
Now, in the Package Manager Console Execute the following command to install Entity Framework version 5.0.0:
Install-Package EntityFramework -Version 5.0.0
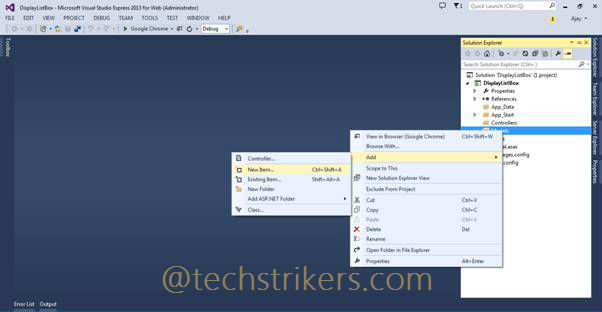
Step 4: All right, now you are ready to create your MVC 5 Scaffolding application with Entity Framework 5.0.0. In order to start, right click on "Models" folder and select "New Item" from popup.
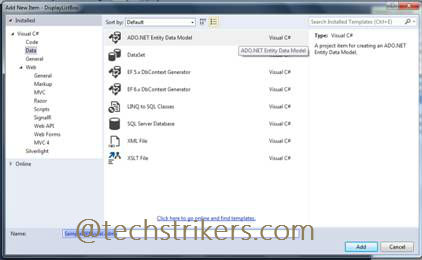
Step 5: Now, select "ADO.NET Entity Data Model" from item and give proper name to your Model.
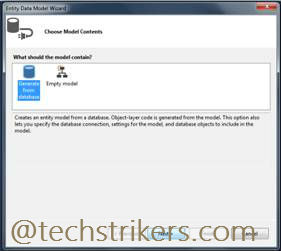
Step 6: Select "Generate from database" from Model wizard click "Next" button.
Step 7: Now, setup a connection with Sql Server database by following wizard instruction given below:
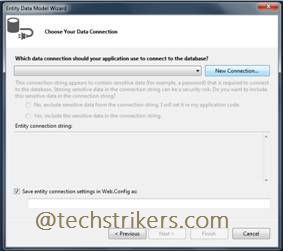
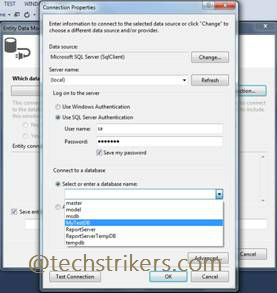
Step 8: Give connection string name and click on "Next" button.
Step 9: Now you can see by default wizard selected Entity Framework 5 selected. Click "Next".

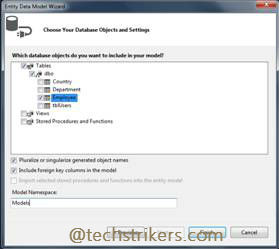
Step 10: Expand tables name list and select table from list. Now give Model name, as you can see below I am given as "Models" here. All right you are all most done with EF Model creation. Click "Finish" button.
Step 11: Once finish, you can see how EF added database context class and table entity class for "Employee" table.
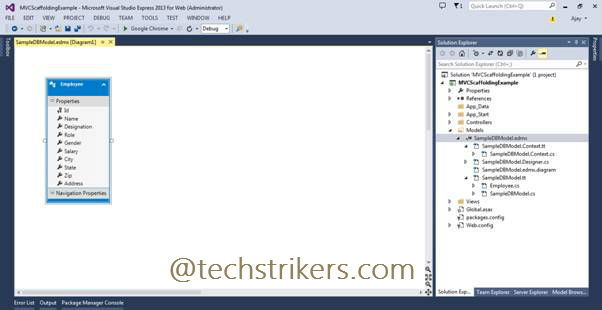
Step 12: If you open DB context class it will looks like below screen shot.
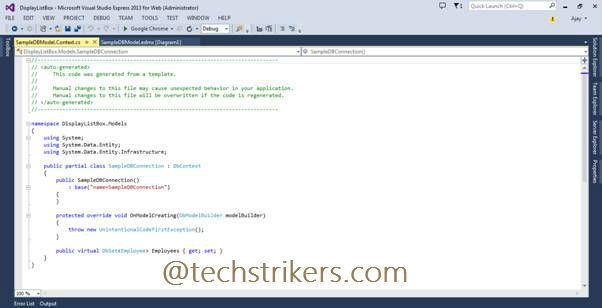
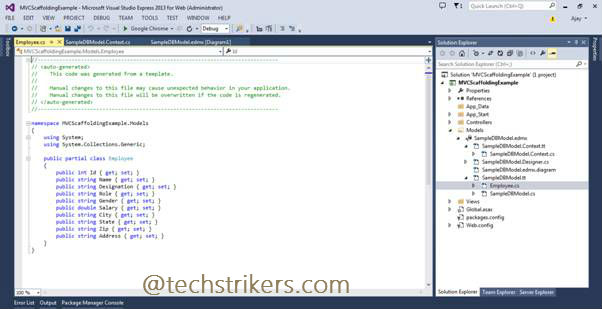
You can observe that our class is deriving from DbContext base class and "Employees" property has been created automatically which is returning Employee db set. Now open "Employee" class, in this class you can see getter and setter properties with name that mapping to the "Employee" table columns.
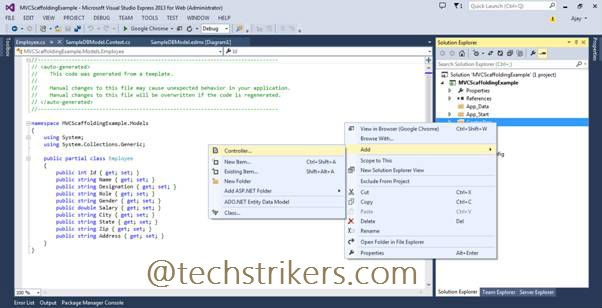
Step 13: All right, now right click on project and build the application. Now right click on Controller folder and select Controller from menu as below screen shot.
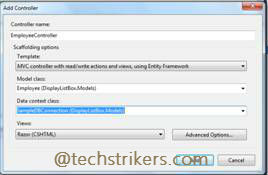
Step 14: Select MVC controller with read/write action and view with EF option from Scaffolding option Template dropdown, select Model class from dropdown list and then select Data context class from dropdown list in our example application "Employees". Click on "Add" button.
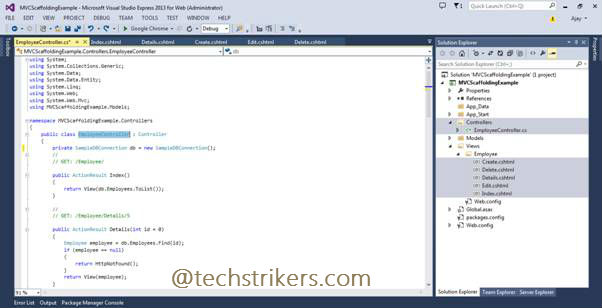
Step 15: Now expand "Controller" and "View" folder (see below screen shot) and see what miracle happed here. ASP.NET MVC created controller class in our example "EmployeeController" which is deriving from "Controller" base class with all the required CRUD operation action methods. Along with controller it will automatically generate respective views like edit view, create view, details view, and delete view which will be used to represent the data to the user.
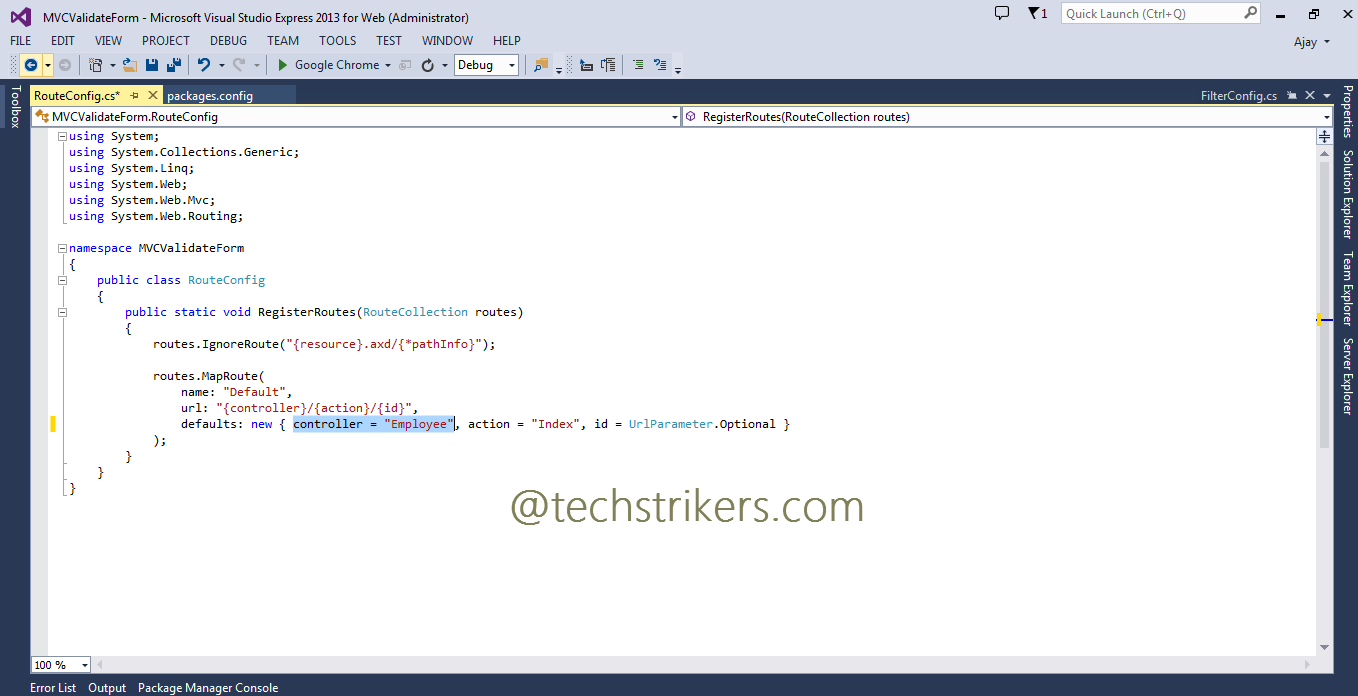
Step 16: When you run application you will get HTTP 404 "the resource cannot be found" error. This is because we are not specifying controller and action name and default controller name is set to "Home" in RouteConfig.cs file. So let's open RouteConfig.cs file and change default controller name to "Employee".
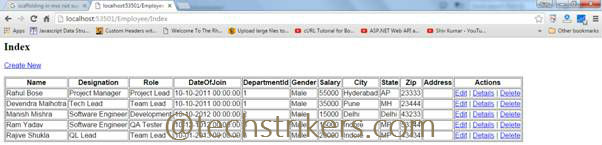
Step 17: All right, we are almost done here. Now build the application and run it. You will see all the employee list in the browser as shown in below screen shot. You can perform any operation like "Create", "Edit", "Detail" and "Delete" operation.
Appreciate your valuable feedback:
I hope this article is useful for you. I look forward for your comments and feedback. So please provide your valuable feedback so that I can make this blog better. You can also share this article by hitting below button.
Happy learning...