Export To Excel From WebGrid In ASP.NET MVC5 and Entity Framework 6
Posted By: Ajay Saptaputre, 17 Oct,2015 | Total View : 12902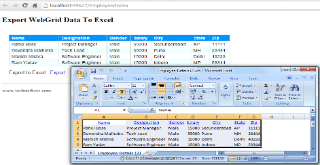
In my previous article I discussed about create CRUD operation using Scaffolding with ASP.NET MVC 5 and database first approach using ASP.NET MVC 5 and Entity Framework 6 and WebGrid in MVC 5 with Razor view and Entity Framework 6
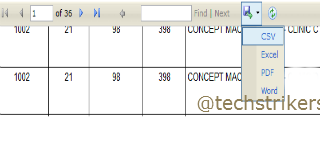
In this article I am going to discuss export data from WebGrid to Excel Sheet. If you are new to WebGrid, please refer my previous article WebGrid in MVC 5 with Razor view and Entity Framework 6 to know more about WebGrid. In this article I will cover all the necessary steps to build ASP.NET MVC 5 application with export to Excel functionality.
In order to start our sample application we will need database table, entity and DBContect classes to fetch the data from database. In this article I am not covering steps those are already covered in my previous article. If you did not read, please refer database first approach using ASP.NET MVC 5 and Entity Framework 6 and follow Step 1 to Step 16 it will help you to understand this article.
Step 1: I hope you already read my previous article. Now, right click on Controller folder and select Controller from menu as below screen shot.
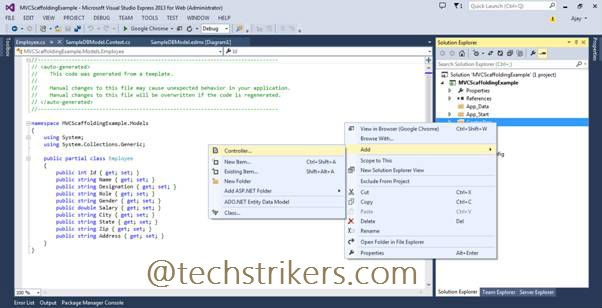
Step 2: Select MVC 5 empty controller, rename controller name as "EmployeeController". Click on "Add" button.
Step 3: Now add below code to controller class. The below code will send list of "Employee" object to view. Also, I have added another method to employee controller called "ExportData". In this method I am creating WebGrid object and setting all the necessary columns using "GetHtml" method of WebGrid. Also, I am using "AddHeader" and "ContentType" methods of "Response" object. The "AddHeader" method is used to set response header with filename and "ContentType" method is used to set type of content we are sending as a response. Finally, writing WebGrid as response. When user requests to export data the "ExportData" method will be called and returns WebGrid including data as response.
using System;
using System.Collections.Generic;
using System.Linq;
using System.Web;
using System.Web.Mvc;
using MVCDisplayWebGrid.Models;

namespace MVCDisplayWebGrid.Controllers
{
    public class EmployeeController : Controller
    {
        public ActionResult Index()
        {
            EmployeeDBContext db = new EmployeeDBContext();
            return View(db.Employees.ToList());
        }

		public void ExportData()
        {
            EmployeeDBContext db = new EmployeeDBContext();
            List employees = new List();
            employees = db.Employees.ToList();

            WebGrid webGrid = new WebGrid(employees, canPage: true, rowsPerPage: 10);
            string gridData = webGrid.GetHtml(
                columns: webGrid.Columns(
                webGrid.Column(columnName: "Name", header: "Name"),
                webGrid.Column(columnName: "Designation", header: "Designation"),
                webGrid.Column(columnName: "Gender", header: "Gender"),
                webGrid.Column(columnName: "Salary", header: "Salary"),
                webGrid.Column(columnName: "City", header: "City"),
                webGrid.Column(columnName: "State", header: "State"),
                webGrid.Column(columnName: "Zip", header: "Zip")
            )).ToString();

            Response.ClearContent();
            Response.AddHeader("content-disposition","attachment; filename=Employee-Details.xls");
            Response.ContentType = "applicatiom/excel";
            Response.Write(gridData);
            Response.End();
        }
	}
}
Step 4: Now right click on "Index" action method, select "Add View" and select "Empty" template from dropdown. To build view we will need to specify model class as "Employee" and data context class as "EmployeeDBContext" as below screen shot illustrate. Click "Add" button. This will add IEnumerable Employee object in view page as below.
@model IEnumerable<MVCDisplayWebGrid.Models.Employee>
Step 5: In order to apply custom theme or CSS style to WebGrid, you need to create css classes first and set respective properties of the WebGrid. See below code snippet:
<style type="text/css">
        .webgrid-table {
        font-family: Arial,Helvetica,sans-serif;
        font-size: 14px;
        font-weight: normal;
        width: 650px;
        display: table;
        border-collapse: collapse;
        border: solid 1px #C5C5C5;
        background-color: white;
    }

        .webgrid-table td, th {
            border: 1px solid #C5C5C5;
            padding: 3px 7px 2px;
        }

    .webgrid-header, .webgrid-header a {
        background-color: #0094ff;
        color:#ffffff;
        text-align: left;
        text-decoration: none;
    }

    .webgrid-footer {
    }

    .webgrid-row-style {
        padding: 3px 7px 2px;
    }

    .webgrid-alternating-row {
        background-color:azure;
        padding: 3px 7px 2px;
    }

    .col1Width {
        width: 55px;
    }

    .col2Width {
        width: 220px;
    }
</style>
Step 6: All right, now add below code to "Index" page to display data using WebGrid. See below code snippet:
@{
    ViewBag.Title = "Index";
    var grid = new WebGrid(source: Model, canPage: true, rowsPerPage: 10);
    grid.Pager(WebGridPagerModes.All);
}

<div id="gridContent" style="font-family: Arial; padding: 20px;">
    @grid.GetHtml(tableStyle: "webgrid-table",
    headerStyle: "webgrid-header",
    footerStyle: "webgrid-footer",
    alternatingRowStyle: "webgrid-alternating-row",
    selectedRowStyle: "webgrid-selected-row",
    rowStyle: "webgrid-row-style",
    columns: grid.Columns(
                grid.Column(columnName: "Name", header: "Name"),
                grid.Column(columnName: "Designation", header: "Designation"),
                grid.Column(columnName: "Gender", header: "Gender"),
                grid.Column(columnName: "Salary", header: "Salary"),
                grid.Column(columnName: "City", header: "City"),
                grid.Column(columnName: "State", header: "State"),
                grid.Column(columnName: "Zip", header: "Zip")

    ))
</div>
Step 7: Now add below code that will add "Export to Data" link. Notice that I am passing "ExportData" action method to Html helper "ActionLink" method as action that will execute when user clicks on link. See below code snippet:
Export to Excel : @Html.ActionLink("Export to Excel", "ExportData", "Employee")
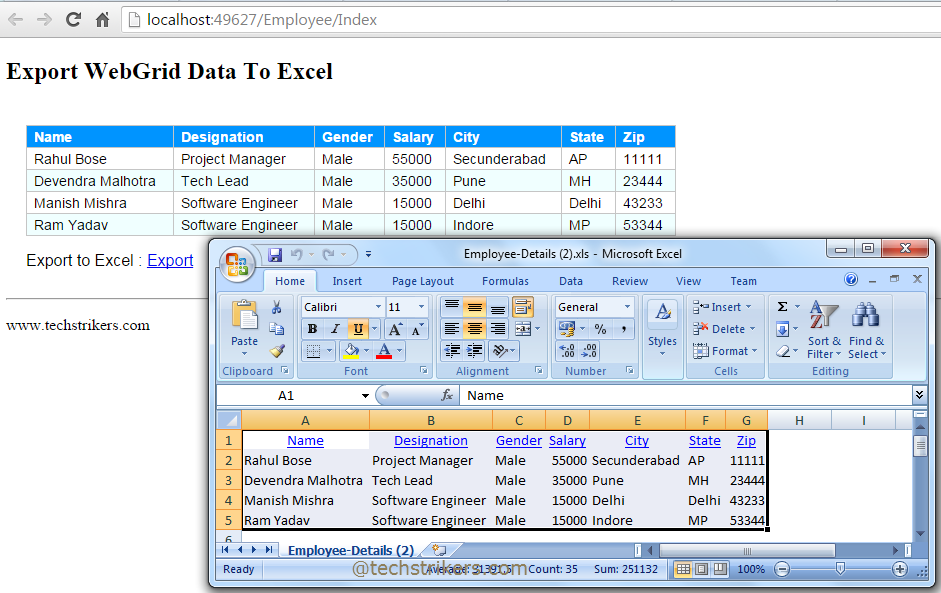
Step 8: All right, our sample ASP.NET MVC 5 export to Excel application is ready to fly. Run the application and click on "Export to Excel" link. This will start downloading Excel file.
Appreciate your valuable feedback:
I hope this article is useful for you. I look forward for your comments and feedback. So please provide your valuable feedback so that I can make this blog better. You can also share this article by hitting below button.
Happy learning...