Database first approach in entity framework 6 with ASP.NET MVC 5
Posted By: Ajay Saptaputre, 12 Oct,2014 | Total View : 15560

In this article I am going to discuss how to generate database centric web application, if you have already database and tables with us and want to build a web application which is based on your existing database.
In database first approach we create Entity Data Model, data context and entity classes from an existing database. The beauty of this approach is entity data model can be automatically updated whenever database schema changes. Also, database-first approach supports stored procedure, view, etc. This article using Entity Framework 6 which will generate complete code that allows us to perform CRUD operation with existing database without writing much code
We will go step by step to construct our sample application. In order to start application development we will need database and table, so let's start creating database table and insert some data into it. In this example I am not creating new database instead using existing SQL Server 2008 database. So let's quickly create database table called "Employee" with auto computed "Id" field. You can use existing database server like SQL Server 2008 or create LocalDB instead.
CREATE TABLE [Employee](
	[Id] [int] IDENTITY(1,1) NOT NULL,
	[Name] [varchar](50) NULL,
	[Designation] [varchar](100) NULL,
	[Gender] [varchar](10) NULL,
	[Salary] [float] NULL,
	[City] [varchar](50) NULL,
	[State] [varchar](50) NULL,
	[Zip] [int] NULL
 CONSTRAINT [PK_Employee] PRIMARY KEY CLUSTERED
(
	[id] ASC
)WITH (PAD_INDEX  = OFF, STATISTICS_NORECOMPUTE  = OFF, IGNORE_DUP_KEY = OFF,
ALLOW_ROW_LOCKS  = ON, ALLOW_PAGE_LOCKS  = ON) ON [PRIMARY]
) ON [PRIMARY]
Now insert some records into the "Employee" database table.
INSERT [Employee]([Name],[Designation],[Gender],[Role],[Salary],[City],[State],[Zip])
VALUES (N'Devendra S',N'Project Lead',N'Male','Manager',12000,N'Bhopal',N'MP',21323)
INSERT [dbo].[Employee]([Name],[Designation],[Gender],[Role],[Salary],[City],[State],[Zip])
VALUES (N'Ram M',N'Engineer IT',N'Male','Developer',8000,N'Indore',N'MP',23333)
INSERT [dbo].[Employee]([Name],[Designation],[Gender],[Role],[Salary],[City],[State],[Zip])
VALUES (N'Manish S',N'Manager',N'Male','QA',9000,N'Delhi',N'Delhi',32334)
INSERT [dbo].[Employee]([Name],[Designation],[Gender],[Role],[Salary],[City],[State],[Zip])
VALUES (N'Rahul E',N'Software Engineer',N'Male','Tech Lead',12000,N'Indore',N'AP',45654)
If you see above database script, I am creating simple "Employee" table and inserting few records into the table. So we have database with us now, what is next? Open Visual Studio and start creating new MVC project. In this article I am using Visual Studio Express 2013 for Web but you can use Visual Studio 2013 as well.
Now start creating ASP.NET MVC 5 project in Visual Studio 2013.
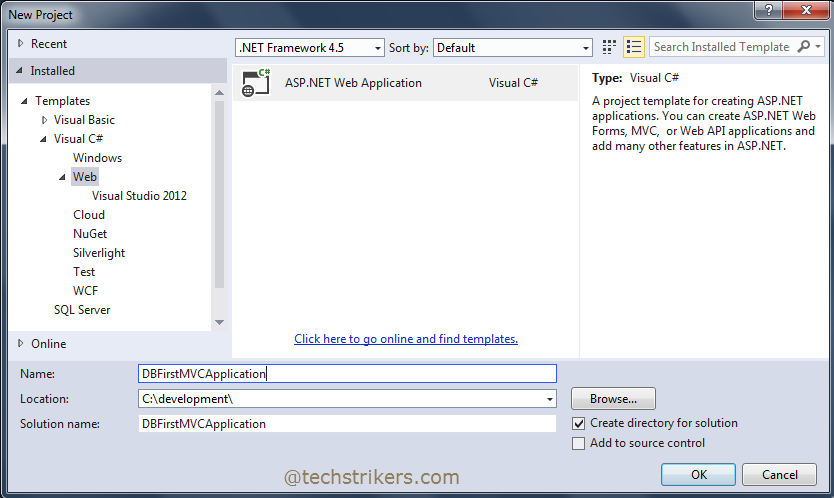
Step 1: Start Visual studio 2013, click on "New" Project from "File" menu and select "Web" and then "ASP.NET web application" from "New Project". I am selecting .Net framework 4.5 to build this sample application. All right, now give proper name as "DBFirstMVCApplication" to your application and click "Ok" button as below screen shot illustrate:
Step 2: Once done, you will see another window which asked to select "Template". Select "Empty" and checked "MVC" then click on "Ok" button as bellow screen shot illustrate:
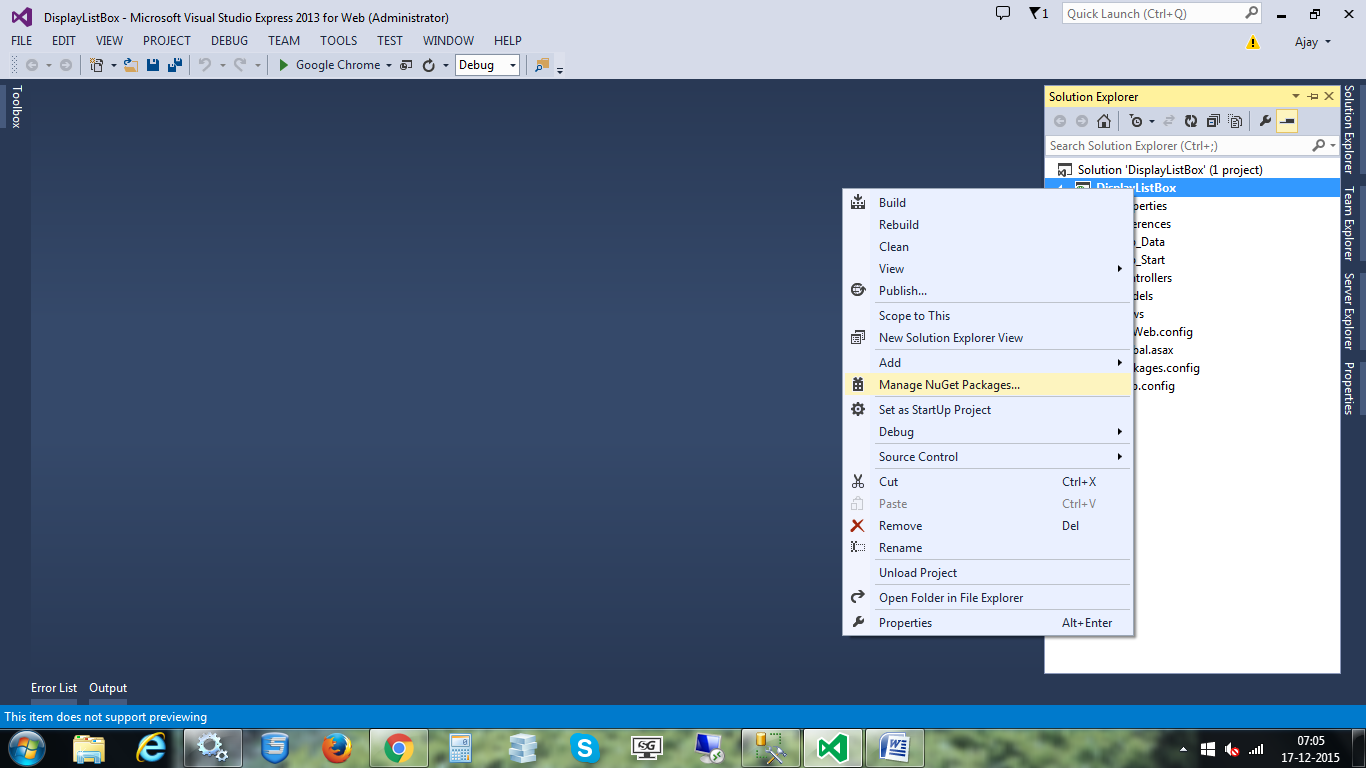
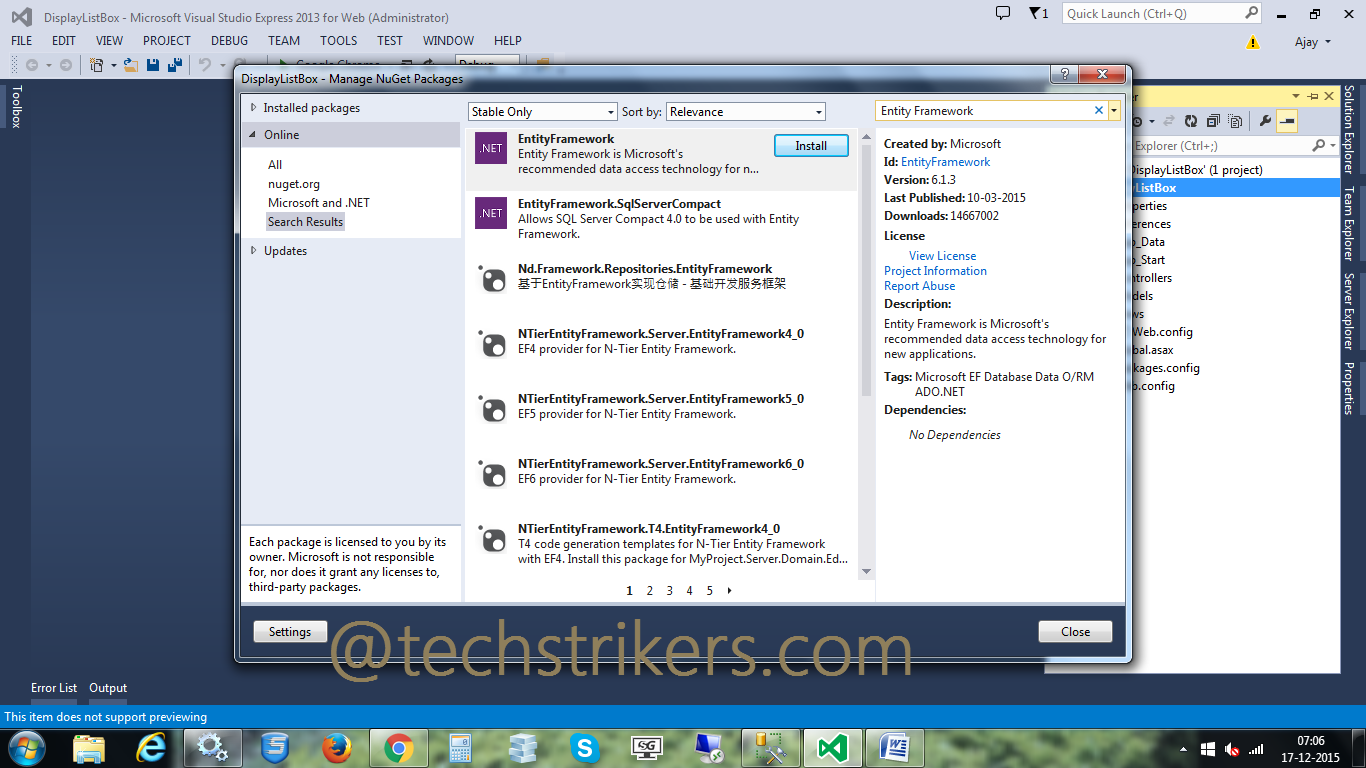
Step 3: In order to use Entity Framework 6 in your project, you need to and add Entity Framework 6(If you have not installed on your system) from "Manage NuGet Packages..". To precede this, right click on your project and select "Manage NuGet Packages..." from menu.
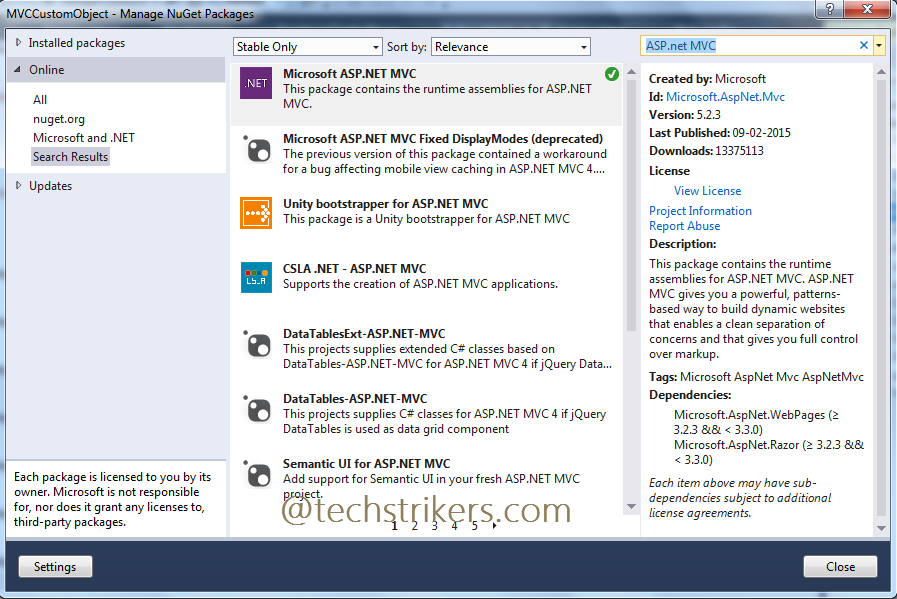
Step 4: From "Manage NuGet Packages" dialog box select "Online" option and then type "Entity Framework 6" from search text box and click on "Install" button after search result display. Now search for ASP.NET MVC, it will search MVC 5 version now click "Install" button. This will installed all the require DLL references to the project. Click "Close" button. This will install all require DLL references in your project
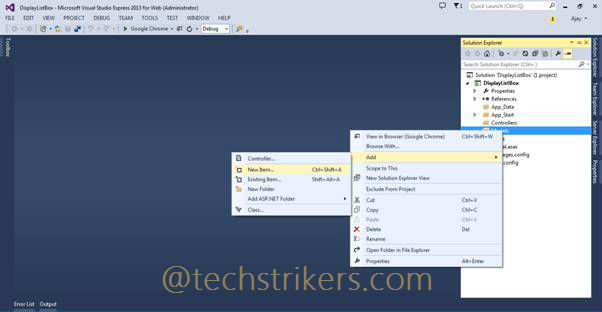
Step 5: All right, In order to start, right click on "Models" folder and select "New Item" from popup.
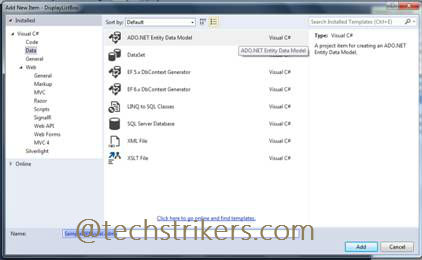
Step 6: Now, select "ADO.NET Entity Data Model" from item and give proper name to your Model.
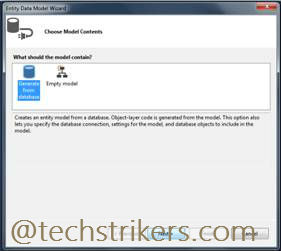
Step 7: Select "Generate from database" from Model wizard click "Next" button.
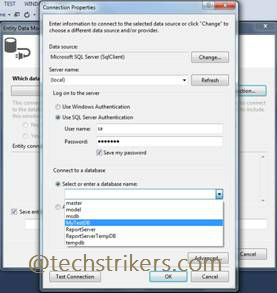
Step 8: Now, setup a connection with SQL Server database by following wizard instruction given below:
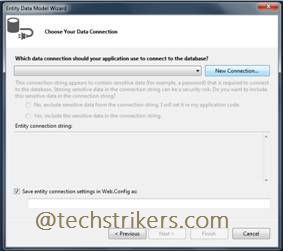
Step 9: Give connection string name and click on "Next" button.
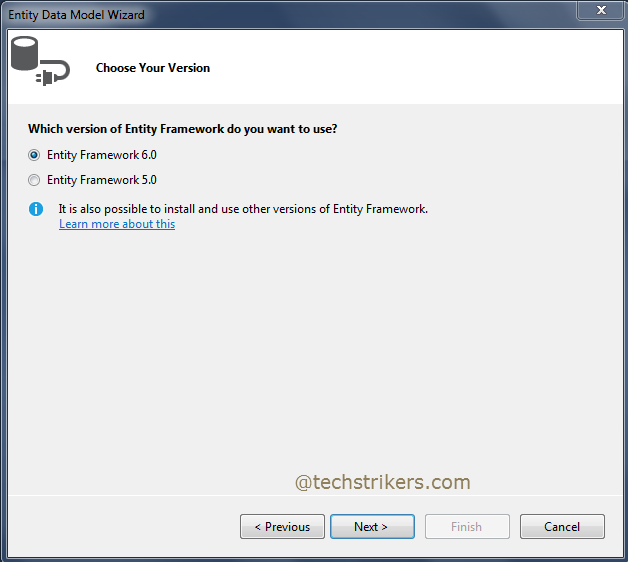
Step 10: Now select Entity Framework 6 from option. Click "Next".
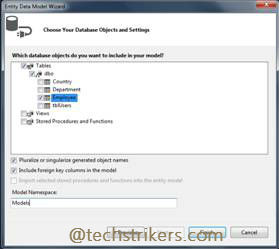
Step 11: Expand tables name list and select table from list. Now give Model name, as you can see below I am given as "Models" here. All right you are all most done with EF Model creation. Click "Finish" button.
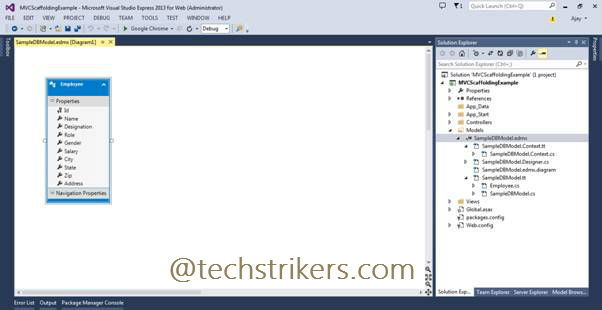
Step 12: Once finish, you can see how EF added database context class and table entity class for "Employee" table.
Step 13: If you open DB context class it will looks like below screen shot.
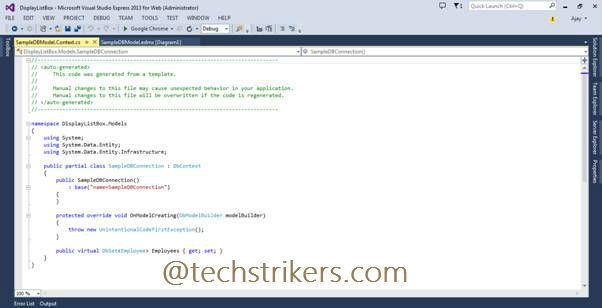
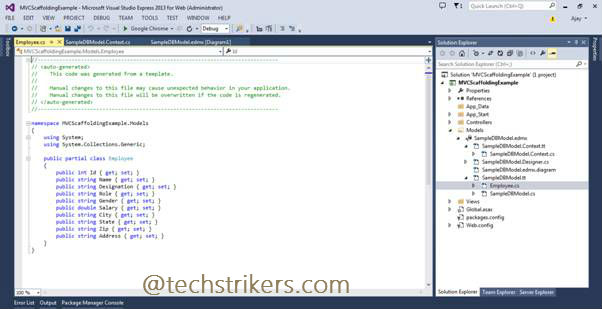
Step 14: You can observe that our class is deriving from DbContext base class and "Employees" property has been created automatically which is returning Employee db set. Now open "Employee" class, in this class you can see getter and setter properties with name that mapping to the "Employee" table columns.
Step 15: All right, now right click on project and build the application. Now right click on Controller folder and select Controller from menu as below screen shot.
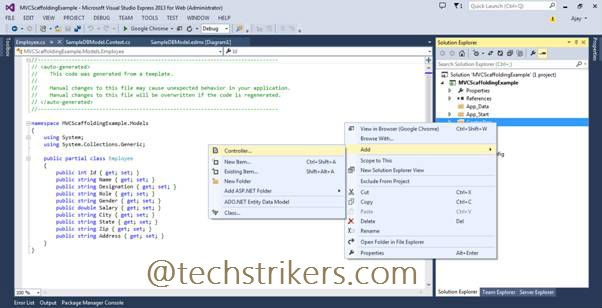
Step 16: Select MVC 5 empty controller, rename controller name as "EmployeeController". Click on "Add" button.
Step 17: Now add below code in controller class. The below code will take care of complete CRUD operation.
using System;
using System.Collections.Generic;
using System.Linq;
using System.Web;
using System.Web.Mvc;
using MVCDatabaseFirst.Models;
using System.Data.Entity;

namespace MVCDatabaseFirst.Controllers
{
    public class EmployeeController : Controller
    {
        private DBFirstModel db = new DBFirstModel();

        //
        // GET: /Employee/

        public ActionResult Index()
        {
            return View(db.Employees.ToList());
        }

        //
        // GET: /Employee/Details/5

        public ActionResult Details(int id = 0)
        {
            Employee employee = db.Employees.Find(id);
            if (employee == null)
            {
                return HttpNotFound();
            }
            return View(employee);
        }

        //
        // GET: /Employee/Create

        public ActionResult Create()
        {
            return View();
        }

        //
        // POST: /Employee/Create

        [HttpPost]
        public ActionResult Create(Employee employee)
        {
            if (ModelState.IsValid)
            {
                db.Employees.Add(employee);
                db.SaveChanges();
                return RedirectToAction("Index");
            }

            return View(employee);
        }

        //
        // GET: /Employee/Edit/5

        public ActionResult Edit(int id = 0)
        {
            Employee employee = db.Employees.Find(id);
            if (employee == null)
            {
                return HttpNotFound();
            }
            return View(employee);
        }

        //
        // POST: /Employee/Edit/5

        [HttpPost]
        public ActionResult Edit(Employee employee)
        {
            if (ModelState.IsValid)
            {
                db.Entry(employee).State = EntityState.Modified;
                db.SaveChanges();
                return RedirectToAction("Index");
            }
            return View(employee);
        }

        //
        // GET: /Employee/Delete/5

        public ActionResult Delete(int id = 0)
        {
            Employee employee = db.Employees.Find(id);
            if (employee == null)
            {
                return HttpNotFound();
            }
            return View(employee);
        }

        //
        // POST: /Employee/Delete/5

        [HttpPost, ActionName("Delete")]
        public ActionResult DeleteConfirmed(int id)
        {
            Employee employee = db.Employees.Find(id);
            db.Employees.Remove(employee);
            db.SaveChanges();
            return RedirectToAction("Index");
        }

        protected override void Dispose(bool disposing)
        {
            db.Dispose();
            base.Dispose(disposing);
        }
	}
}
Step 18: Now right click on "Index" action method, select "Add View" and select "List" template from dropdown. To build view we will need to specify model class as "Employee" and data context class as "DBFirstModel" as below screen shot illustrate. Click "Add" button.
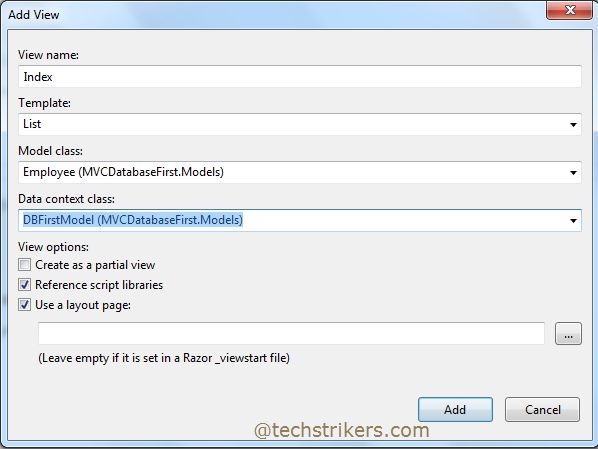
Step 19: In order to create other views for "Details", "Delete", "Create" and "Edit" follow the step 19 and select "Details", "Delete", "Create" and "Edit" templates respectively. This will automatically generate view in "Employee" folder under "Views" folder to render the data and set the model reference in each view page appropriately.
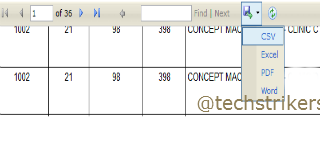
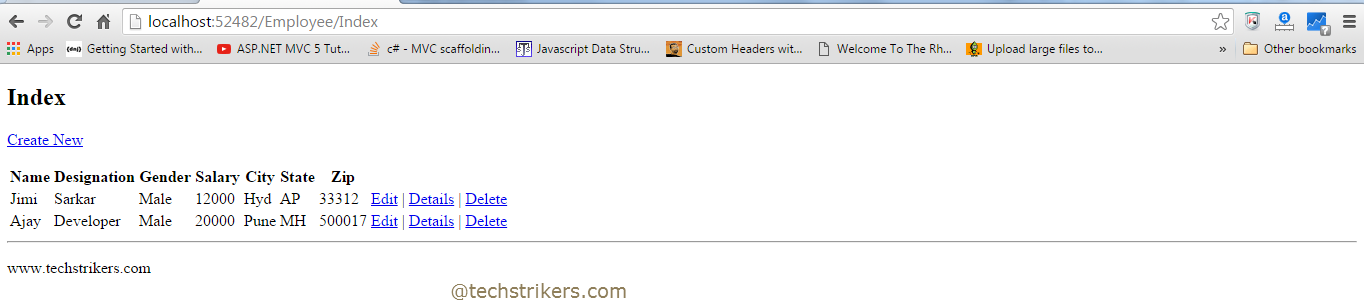
Step 20: Run the application and from browser add controller and action method name in URL as bellow. This will display all the employees from database as we are passing to our view.
Appreciate your valuable feedback:
I hope this article is useful for you. I look forward for your comments and feedback. So please provide your valuable feedback so that I can make this blog better. You can also share this article by hitting below button.
Happy learning...