Different view engines razor and ASPX in single MVC 4 application with Entity Framework 5
Posted By: Ajay Saptaputre, 10 Aug,2015 | Total View : 7897
In this article I am going to discuss how to use different view engines which is available in ASP.NET MVC 4 application. But default ASP.NET offers two view engines "RAZOR" and "ASPX" view engine.
Before we begin with these view engines, let's first understand what is the difference between "RAZOR" and "ASPX" view engine.
- In "ASPX" view engine, the server side script is wrapped between <% %>, where as in "RAZOR" we use @.
- In "RAZOR" view engine, it has the extension of ".CSHTML" or ".VBHTML" depending on the programming language you have chosen. Whereas "ASPX" view has the extension of ".ASPX"
You can have both "RAZOR" and "ASPX" view engine in one ASP.NET MVC application. Also it is possible to use third party view engine with your ASP.NET MVC. This is because of ASP.NET MVC designed with extensibility in mind.
So let's start creating our ASP.NET MVC application that uses different view engines.
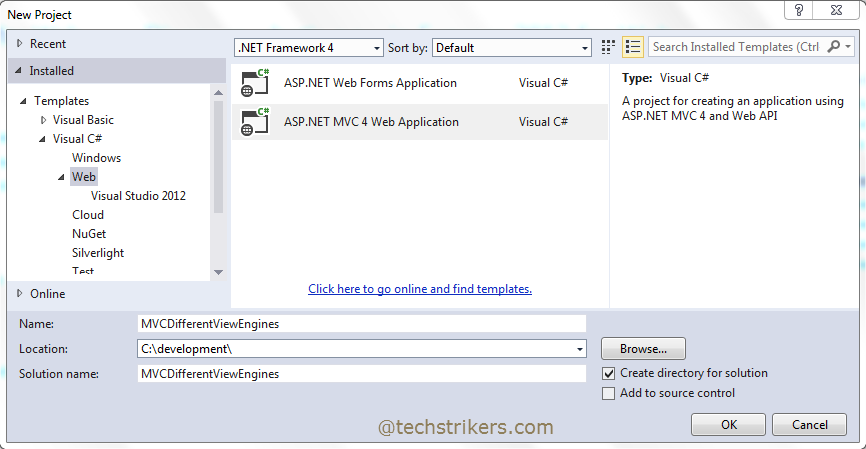
Step1 : Start Visual studio 2013, click on "New" Project from "File" menu and select "Web" and then "ASP.NET MVC 4 web application" from "New Project". I am selecting .Net framework 4 to build this sample application. All right, now give proper name to your application and click "Ok" button as below screen shot illustrate:
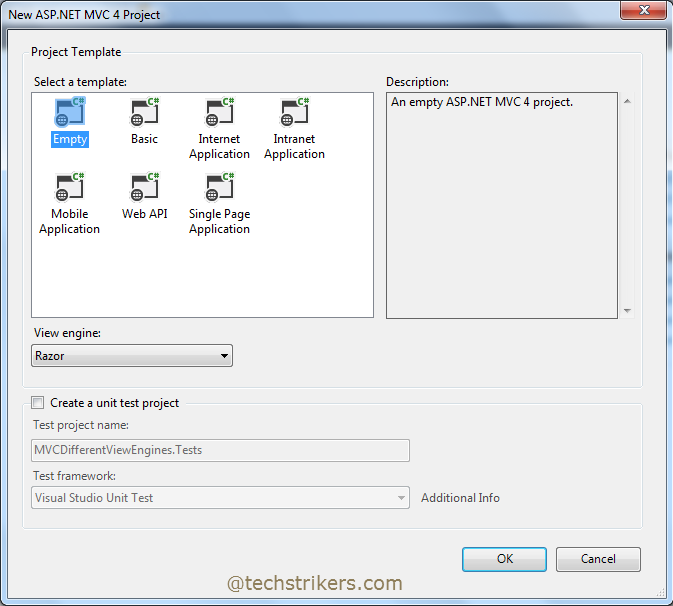
Step 2: From new ASP.NET MVC4 project dialog box select "Empty" project template and "Razor" from view engine dropdown. Click on Ok button.
Step 3: This will start configuring the project with require references. It also creates complete MVC structure that includes:
App_Data, App_Start, Controllers, Models, Views, Global.ascx, Web.Config and packages.config.
Step 4: Now go to solution explorer and right click on "Models" folder and then "Add" and then "New Item" from menu.
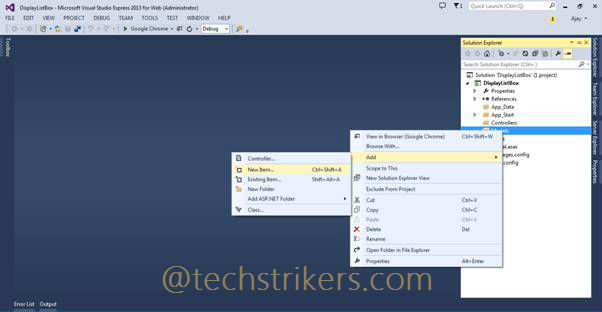
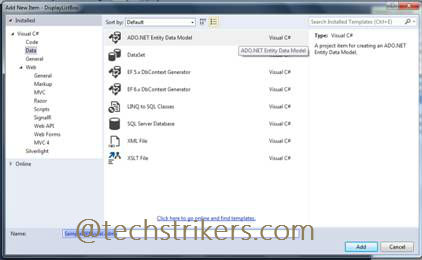
Step 5: Select "Data" and then select "ADO.NET Entity Data Models" give proper name and click "Add" button.
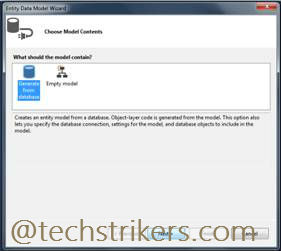
Step 6: Form Entity Data Model wizard select "Entity Framework 5" option and click on "Next" button.

Step 6: From Entity Data Model Wizard, select "Generate from database" option and click "Next" button.
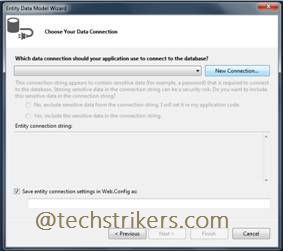
Step 7: Click on "New Connection" button and then from connection properties window select data source name and login information and finally select database name from dropdown. Now click "Ok" button.
Step 11: Now give proper name for connection string which will save into the web.config file in your application. Click on "Next" button.
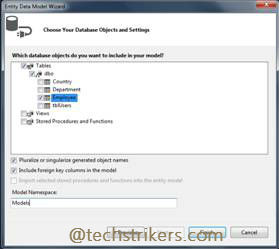
Step 12: Select appropriate table(s) and give model namespace name and click on "Finish" button.
Step 13: The above process will create "SampleDBModels.edmx", SampleDBModels.cs and tblEmployee.cs files in the "Models" folder. Now rename you entity from "tblEmployee" to "Employee".
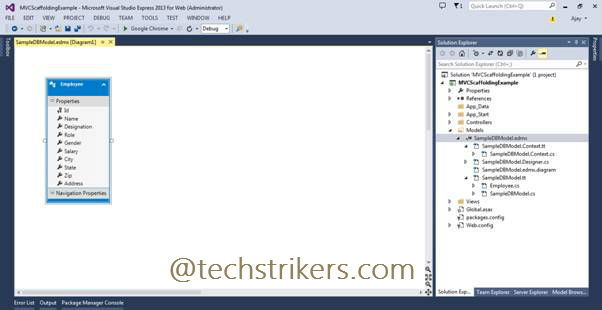
Step 14: It's time to build your solution, right click on project and click on "Build" option from menu. Now open your "SampleDBModels.context.cs" from solution explorer. In this file you will find "SampleDBModels" class which is deriving from DbContext base class and one virtual property "Employees" which has DbSet return type. This "Employees" property allows you to do CRUD operation on database with minimal effort of coding.
//------------------------------------------------------------------------------
//
//     This code was generated from a template.
//
//     Manual changes to this file may cause unexpected behavior in your application.
//     Manual changes to this file will be overwritten if the code is regenerated.
//
//------------------------------------------------------------------------------
namespace MVCDifferentViewEngines.Models
{
    using System;
    using System.Data.Entity;
    using System.Data.Entity.Infrastructure;

    public partial class SampleDBModel : DbContext
    {
        public SampleDBModel()
            : base("name=SampleDBModel")
        {
        }

        protected override void OnModelCreating(DbModelBuilder modelBuilder)
        {
            throw new UnintentionalCodeFirstException();
        }

        public DbSet Employees { get; set; }
    }
}
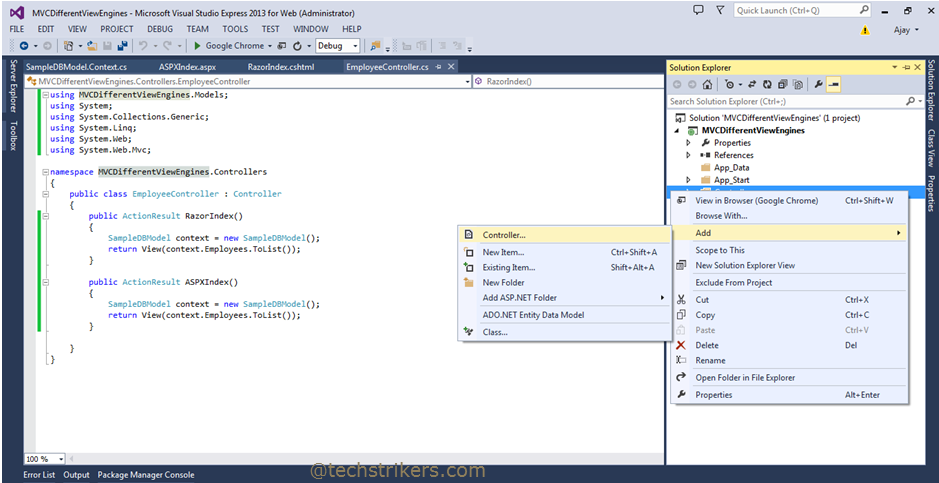
Step 15: Till now we have created our model class, now we need to add controller which will get or set the data from our model and pass it to view which in turn will display formatted data to the users. In order to add controller right click on controller's folder and then select "Add" and finally controller from menu.
Step 16: Give controller name and select appropriate template from dropdown. In this example I have selected empty MVC controller option and click "Add" button.
This will create empty Index method in Employee controller as below.
using System;
using System.Collections.Generic;
using System.Linq;
using System.Web;
using System.Web.Mvc;

namespace MVCDifferentViewEngines.Controllers
{
    public class EmployeeController : Controller
    {
        public ActionResult Index()
        {
            return View();
        }
    }
}
Step 17: Now add below code in controller class in which both "RazorIndex" and "ASPXIndex" action methods will pull all the employees from database and hands it to view.
using System;
using System.Collections.Generic;
using System.Linq;
using System.Web;
using System.Web.Mvc;
using MVCDifferentViewEngines.Models;

namespace MVCDifferentViewEngines.Controllers
{
    public class EmployeeController : Controller
    {
        public ActionResult RazorIndex()
        {
            SampleDbConnection context = new SampleDbConnection();
            return View(context.Employees.ToList());
        }
        public ActionResult ASPXIndex()
        {
            SampleDbConnection context = new SampleDbConnection();
            return View(context.Employees.ToList());
        }
    }
}
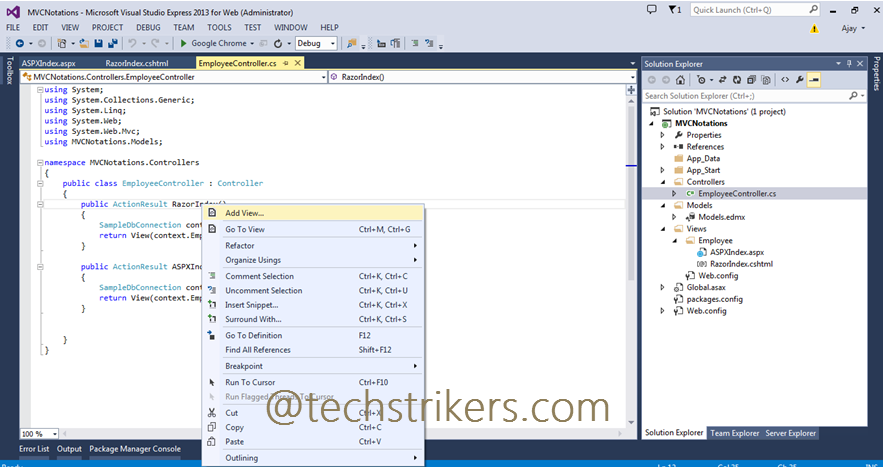
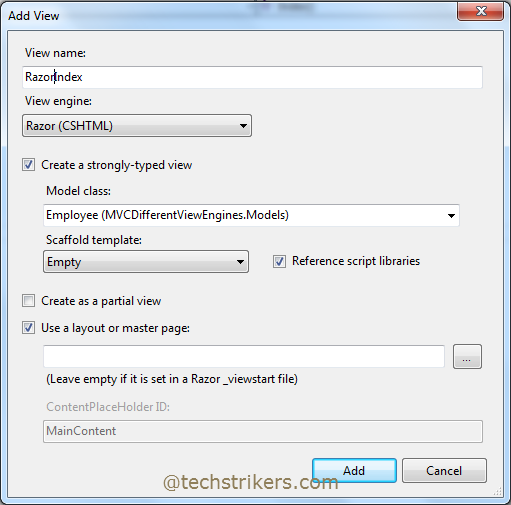
Step 18: Now right click on "RazorIndex" action method and select "Add View" from menu.
Step 19: From "Add View" menu select "View Engine" as "Razor" and check "Crate a strongly-type view checkbox" and select model class that we have created. Keep Scaffold template empty for now. Click "Add" button.
Step 20: Now add below code in Index view file.
@model IEnumerable
@{
    ViewBag.Title = "Index";
}
<div style="font-family:Arial">
    <fieldset>
        <legend>Employee Using Razor Engine</legend>
        @foreach (var emp in Model)
        {
            <div class="display-label">
                @Html.DisplayNameFor(model => model.Name)
				@Html.DisplayFor(model => emp.Name)
            </div>
            <div class="display-label">
                @Html.DisplayNameFor(model => model.Designation)
				@Html.DisplayFor(model => emp.Designation)
            </div>
            <div class="display-label">
                @Html.DisplayNameFor(model => model.Role)
				@Html.DisplayFor(model => emp.Role)
            </div>
            <div class="display-label">
                @Html.DisplayNameFor(model => model.Gender)
				@Html.DisplayFor(model => emp.Gender)
            </div>
            <div class="display-label">
                @Html.DisplayNameFor(model => model.Salary)
				@Html.DisplayFor(model => emp.Salary)
            </div>
            <div class="display-label">
                @Html.DisplayNameFor(model => model.City)
				@Html.DisplayFor(model => emp.City)
            </div>
            <div class="display-label">
                @Html.DisplayNameFor(model => model.State)
				@Html.DisplayFor(model => emp.State)
            </div>
            <div class="display-label">
                @Html.DisplayNameFor(model => model.Zip)
				@Html.DisplayFor(model => emp.Zip)
            </div>
            <div class="display-label">
                @Html.DisplayNameFor(model => model.Address)
				@Html.DisplayFor(model => emp.Address)
            </div>
            <div>---------------------------------</div>
        }
    </fieldset>
</div>
Step 21: Run application and from browser add controller and action method name in URL as bellow. This will display all the employees from database as are passing to our view.

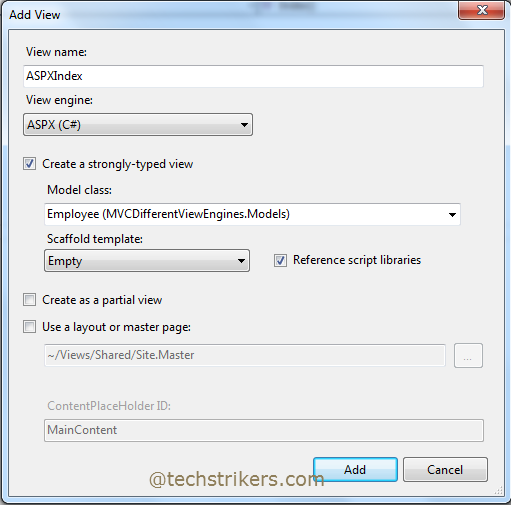
Step 22: Now go back to our controller and right click on "ASPXIndex" action method and this time select "ASPX" as view engine including check "Crate a strongly-type view" checkbox and select model class that we have created. Click "Add" button.
Step 23: Now add below code in Index view file. Notice that "ASPX" engine uses classic "<%: %>" tag to process the server side code.
<%@ Page Language="C#"
Inherits="System.Web.Mvc.ViewPage
<IEnumerable<MVCDifferentViewEngines.Models.Employee>>" %>

<!DOCTYPE html>

<html>
<head runat="server">
    <meta name="viewport" content="width=device-width" />
    <title>ASPXIndex</title>
</head>
<body>
    <div>
        <fieldset>
            <legend>Employee Using ASPX Engine</legend>
        <% foreach (var item in Model) { %>
        <div class="display-label">
            <%: "Name " + Html.DisplayFor(modelItem => item.Name) %>
        </div>
        <div class="display-label">
            <%: "Designation " +  Html.DisplayFor(modelItem => item.Designation) %>
        </div>
        <div class="display-label">
            <%: "Gender " + Html.DisplayFor(modelItem => item.Gender)%>
        </div>
        <div class="display-label">
            <%: "Role " + Html.DisplayFor(modelItem => item.Role) %>
        </div>
        <div class="display-label">
            <%: "Salary " + Html.DisplayFor(modelItem => item.Salary) %>
        </div>
        <div class="display-label">
            <%: "City " + Html.DisplayFor(modelItem => item.City) %>
        </div>
        <div class="display-label">
            <%: "State " +  Html.DisplayFor(modelItem => item.State) %>
        </div>
        <div class="display-label">
            <%: "Zip " + Html.DisplayFor(modelItem => item.Zip) %>
        </div>
        <div class="display-label">
            <%: "Address " + Html.DisplayFor(modelItem => item.Address)%>
        </div>
        <div>---------------------------------</div>
        <% } %>
    </fieldset>
    </div>
</body>
</html>
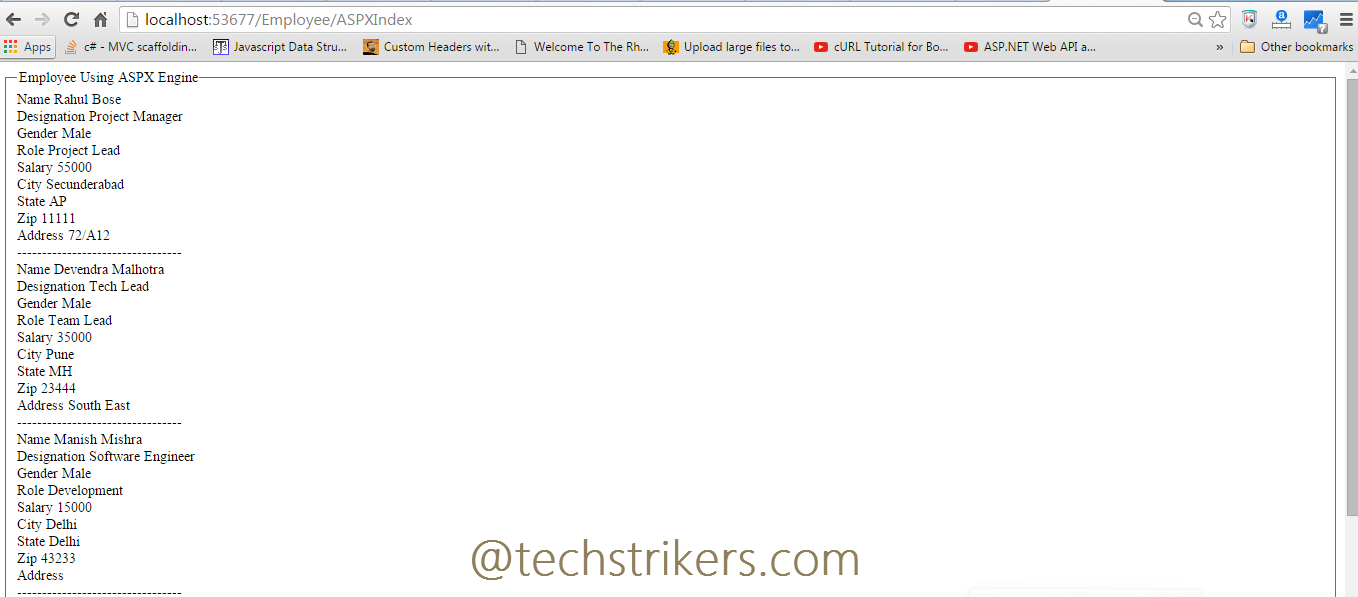
Step 24: Run the application and from browser add controller and action method name in URL as bellow. This will display all the employees from database as we are passing to our view.
Appreciate your valuable feedback:
I hope this article is useful for you. I look forward for your comments and feedback. So please provide your valuable feedback so that I can make this blog better. You can also share this article by hitting below button.
Happy learning...